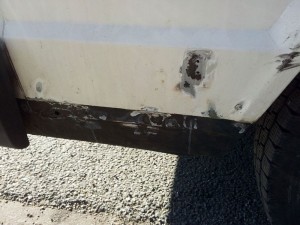
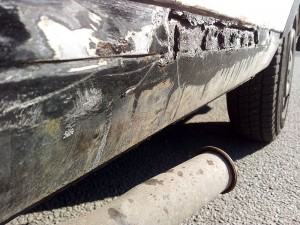
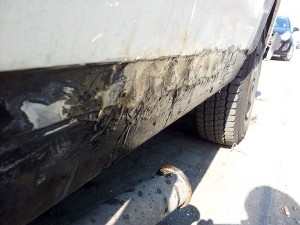
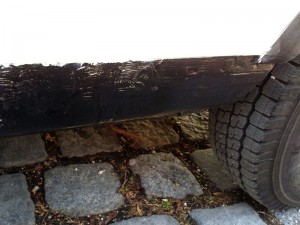
This past weekend we enjoyed a burst of proactive energy thanks to the warm, sunny weather. As a result I took a leap of faith an attempted to tackle some not particularly threatening but ugly looking rust along the rocker panel on one side of the van and Iva emptied and cleaned out the entire van.
The main challenge with repairing the rust damage was that I have absolutely no idea how to repair rust damage. That said, that’s precisely how a million wonderful journeys of discovery have started in my life*, so I wasn’t going to let that stop me.
*Like the time I cheerfully hacksawed my way through the freon pipe in my fridge and had to evacuate my apartment for an hour.
I started by buying a sanding attachment for my handheld power drill and proceeding to sand the hell out of the various brown bits along the bottom of the van until all the brown was gone. Mostly this went smoothly, but underneath the biggest area of brown I discovered more brown, and underneath that: air … aka a hole.
Obviously, at some point in the van’s history someone had slightly dented and scratched this part of the body and then just painted over the dent. Fast forward through 10 years of water and salt and quite a bit of the metal had rusted away. Fortunately the holes were relatively small and concentrated in one 20cm area, so it seemed realistic to have a go at dealing with them without the supervision of a professional. Or a real adult.
Next stop: Hornbach, for some DIY advice and several bottles of chemicals with intimidating pictures of skulls and crossbones on the side.
I was surprised to find out that no-one at Hornbach was able to tell me exactly what to buy, or how to solve the problem, although they did have quite a selection of products which were obviously intended for ths task at hand. I proceeded to read the instruction on the various pots and bottles and after some head-scratching I opted for the “complete repair kit”, with a litre of very dangerous liquid of some sort, a tube of dangerous paste of some other sort and two big pieces of nylon.
This will be fun, I chuckled to myself!
I also bought some “rust converter” to turn the nasty rust into some more amenable cousin-of-rust. Back in the van I already had two cans of spraypaint to cover up whatever mess may result from my attempts to do good.
Joking aside, it actually went quite well, once I’d figured out that I had bought some sort of fibre glass. Applying it was very much like making papier maché (10: dip …. 20: stick … 30: goto 10), only this was evil papier maché which gave off fumes that made my head feel tingly.
Although I don’t have any convincing “after” pictures to prove it, the results for the most part were excellent. After a coat of paint there was no sign of the damage at all, although I did manage to get paint on my new trousers. And on my new shirt.
There’s a lesson to be learned there, I think.


